STEP 1. LINKING PHASE
Drag to the scene an instance of the prefab that encompasses all the functionality of “2D MAPS GENERATOR” called “Map Base” located inside the PREFABS-CORE folder. Two "game objects" (GO hereinafter) are automatically created that will serve to keep the structure of the scene clean since the objects created by the spawners will later be instantiated with a transform children of these GOs. The shape of the map thus created is defined by some default parameters and they are a random starting point.

- Create or obtain from an art creator the three materials required.
- Create the 2 “scriptable objects” needed in each map (Path: Assets -> create -> “MapMatSO” and “MapSO”). The first “MapMatSO” is where we will assign the three main materials of the map (background material, mesh material and map renderer material. The first two materials use a color shader and the third a “texture shader transparent”). This first “scriptable object” is assigned in the second one that we create “MapSO” and that represents the user interface of “MAP GENERATOR 2D”. Warning: When creating "MapSO" you have to assign "MapMatSO" manually. The texture assigned to the “floorMat” must be configured as “wrap mode” = “repeat”.
- Drag to the scene an instance of the prefab that encompasses all the functionality of “2D MAPS GENERATOR” called “Map Base” located inside the PREFABS-CORE folder. Two "game objects" (GO hereinafter) are automatically created that will serve to keep the structure of the scene clean since the objects created by the spawners will later be instantiated with a transform children of these GOs. The shape of the map thus created is defined by some default parameters.
- Assign the "MapSO" from step 1 in "Map Base" prefab. From this moment on, any change in the "MapSO" parameters, this is our UI, will have an effect in real time in the editor.


Drag the other two support “prefabs” that are included to be able to quickly test the generated map and that respectively manage a 2d controller (“prefab player”) and a camera that uses “Cinemachine”. Warnings: If you want to use these two support prefabs you need to install them (packages -> Unity Registry (“Input System” and “Cinemachine”), otherwise, just remove them and use your own 2d controller and camera systems).

STEP 2. MAP CREATION PHASE
Once everything is linked, we will focus on the UI of our map generators. The design criteria has only been to expose those parameters that have a real influence on the final result, since an excessive exposure of configuration parameters, far from representing a more complete and configurable proposal, ends up being a more complex proposal, less intuitive and just as configurable. We will address the configuration parameters one at a time.
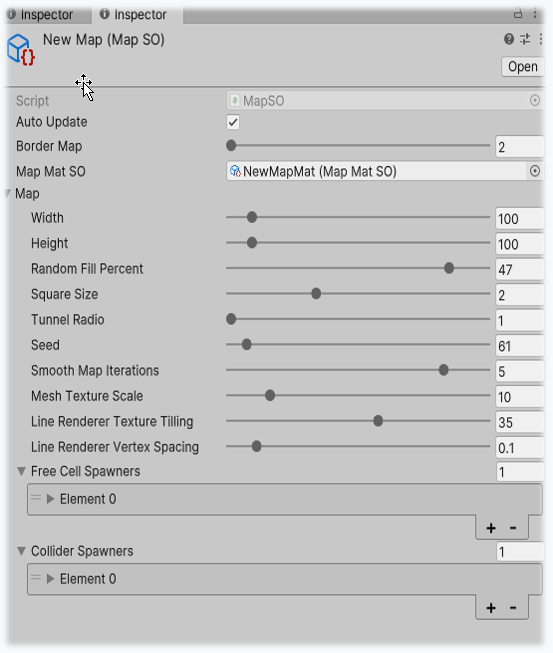
AUTOUPDATE
Makes the modification of variables in this "asset" show the effects in the map in real time.
BORDERMAP
Sets the thickness of the walls surrounding the map.

WIDTH AND HEIGHT
Autodescriptive.
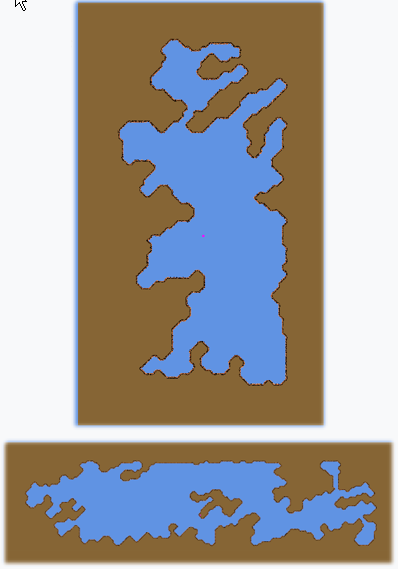
RANDOMFILLPERCENT
This parameter sets the percentage of the wall tiles represented by 1 in the binary matrix created as the starting point with the width anf height before defined.

SQUARE SIZE
Sets the scale of the map

TUNNEL RADIO
All open areas must reachable, if not a tunnel is created to make the needed connections. This parameter sets the width of the tunnels.
SEED
Different seed, different map.

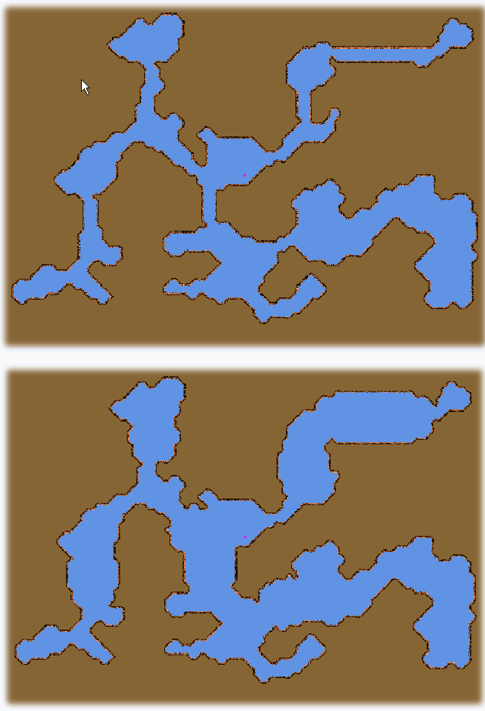
SMOOTH MAP ITERATIONS
Low values generate more abrupt and angular shapes on the map surfaces and high values generate more rounded shapes.

MESHTEXTURESCALE

LINERENDERERTEXTURETILLING

LINERENDERERVERTEXSPACING

Crea tu propia página web con Webador