STEP 3. POPULATE THE MAP PHASE
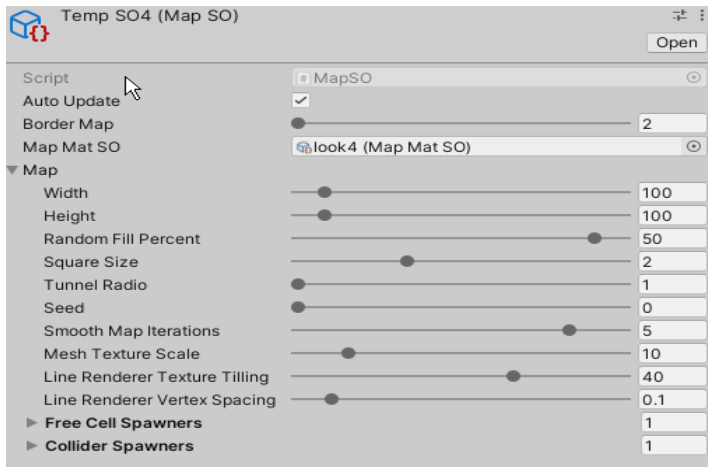
Assign the "sprites" of the "Sprite sheets" according to design criteria in the "spawners" and "play" with their parameters until you get a map that likes. In the "prebab" "Map Base" there is a component called "MapGeneratorCNB" that exposes a parameter type "bool" called "SpawnFreeCellBool" with which you have to be careful because it makes modifications in real time in the UI ("MapSO" ), will also spawn in real time all the list of “Free Cell Spawners” so it can be computationally expensive and we recommend only activating it at the beginning on a not very large map in order to see if the parameters of the “ spawners” produce the desired result especially in relation to the density of objects created and the scale of them, then deactivate it!!.
On the same site, there are 5 buttons whose functionality we will explain below.

The first four buttons are self-descriptive. One launches the command to spawn and the other removes the spawned items, for each of the two types of spawner lists “Free Cell Spawners” and “Collider Spawners”. The fifth button “Load Map SO” orders to create a new map with the parameters established in “MapSO”. If "MapSO" is configured with its parameter "bool" "Autoupdate" in "true", this button does not have to be used because as soon as a parameter is changed, the order to create a map is sent automatically, but if it is "false", using this button is the way to send the command to generate the map. A priori it does not seem very useful, but if for example I am going to make a very large map of 800 x 600, as I go up the sliders of "width" and "height" there comes a time when the calculations is heavy and create the map in real time slows down so I can turn “Autoupdate” to “false”, modify “width” and “height” and press this button to generate the map only every time I press it and not when parameters are modified. In small and medium maps it is very fluid and there is not need to use this trick.
In the “prebab” “Map Base” there is another component called “MeshGeneratorCNB” that exposes a “bool” type parameter called “SpawnInCollidersBool” with which you have to be careful, as with the previously explained (“FreeCellColliderBool”) and for the same reasons exposed. Likewise and on the same site, 2 buttons and a slider are exposed whose functionality we will explain below.

After a first phase of generation and population with "props" of the generated map, and reaching a result close to the one sought, "2D MAPS GENERATOR" allows you to enter a second phase "EDIT MODE" in which user control over the final map will be complete as it will be possible to modify the vertices of the generated map surface in the editor in real time through a simple and intuitive user interface. You can edit, try as it is, edit again as many times as you want, but if you press the "EXIT MESH EDIT MODE" button, all the changes will be lost, returning to the situation prior to pressing "ENTER MESH EDIT MODE". In "MESH EDIT MODE" you cannot create objects with "spawners" so you have to make sure you have the map populated before entering "MESH EDIT MODE". This option must be understood as the possibility of reaching the highest level of customization possible in the shape of the map by being able to modify the position of all the vertices of the Mesh of the map, but it is a last step to take only when one is very comfortable with the shape of its map, its "look" and how we have populated it. In "MESH EDIT MODE" the position of the vertices is modified with "Editor Handles", using the mouse and its left button, when I have modified some vertices I have to re-generate the "colliders" of the surface again for what I use the “Generate Colliders” button that is only shown in “MESH EDIT MODE”.


Finally, the “EditGroupDistance” “slider” is represented by the semi-transparent red circle that defines an area such that if other vertices that are not the one I am moving are inside this influence area, they will move jointly with the one I am modifying. In this way, for modifications of the "Mesh" less detail I will configure the "slider" in higher values and for detail adjustments in lower values to ensure that I only modify one vertex.


Crea tu propia página web con Webador