LINKING PHASE
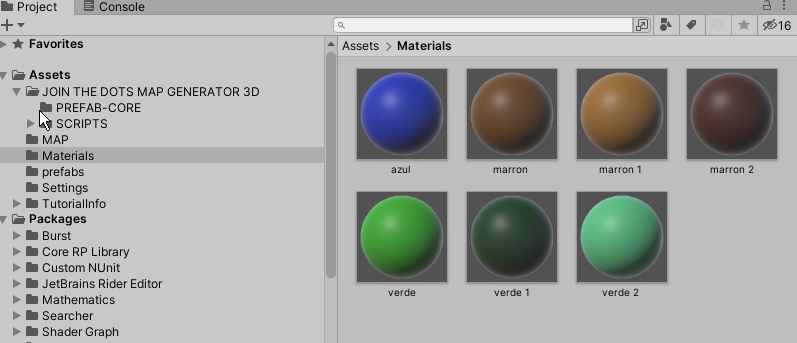
In this section we show how easy it is to create a map with the only artistic resources of a few materials and a few 3D objects included in the Unity engine. All resources used in the example map included in “MAP GENERATOR 3D” are resources that Unity includes because the purpose is to demonstrate functionality without conflicting with any creator's copyright.

The steps will be the following starting from an empty scene:
LINKING-STEP 1:
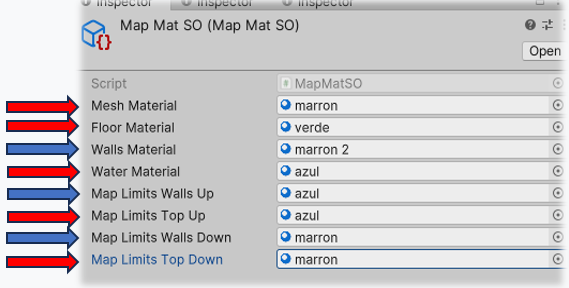
I create a “Scriptable object” type “MapMatSO” and assign materials from those created in the materials folder.

This is the appropriate section to highlight that our utility includes the necessary methods to, in all the materials linked in “MapMatSO”, automatically calculate and assign the variant “Tilling.Y” based on the variable “Tilling.X” that we assign in the inspector for each element to which the material is applied. In the example included in the utility with materials without textures it is irrelevant, but in maps made with “materials” made by artists the functionality of, depending on the shape of the map, automatically calculating the “Tilling.Y” every time generates the map for all materials, allowing a proportionate texture to be displayed at all times.

As a tip, for materials highlighted in red, we recommend values to assign to “Tilling.X” of 20-40 in the inspector, while for those highlighted in blue 200 or above.
LINKING-STEP 2:
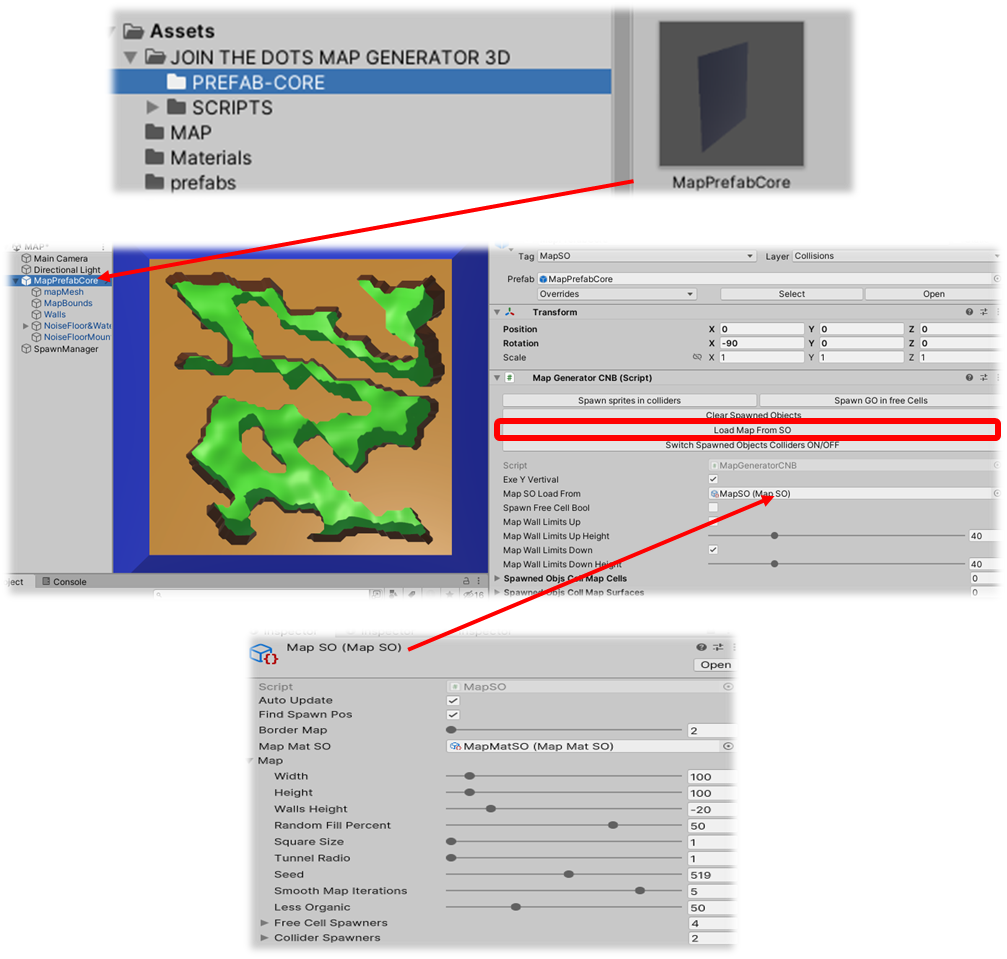
I create a “Scriptable object” type “MapSO” and assign the “Scriptable object” “MapMatSO” created in the first step in the corresponding section.

LINKING-STEP 3:
I drag the “prefab” “MapPrefabCore” to the scene from the “JOIN THE DOTS MAP GENERATOR 3D” -> “PREFAB-CORE” folder and assign the “Scriptable object” “MapSO” created to it in the corresponding section. in the second step. Finally I press the inspector button inside the “MapGeneratorCNB” component included in the “MapPrefabCore” “prefab” called “Load Map From SO”.
MAP CREATION PHASE
Once everything is linked, we will focus on the UI of our generated maps. The design criterion has only been to expose those parameters that have a real influence on the final result since an excess of exposure of configuration parameters, far from representing a more complete and configurable proposal, ends up being a more complex, less intuitive and just as configurable. We will address the configuration parameters one at a time.
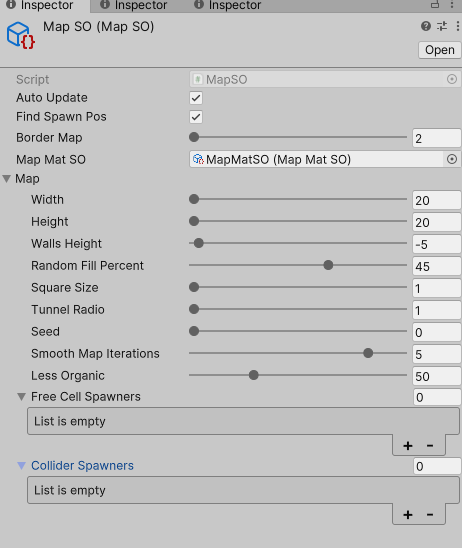
AUTOUPDATE:
Makes the modification of variables exposed in “MapSO” show the effects on the map in real time.
FIND SPAWN POS:
Collect all possible locations for each area type of each “free cell spawner” so you can use them later. The purpose of this variable is that this search is only carried out because it is computationally expensive, when necessary and it is made public because if you do not want to create “free cell spawners” because you want to populate the props map in another way, the box is deselected and calculations are saved.
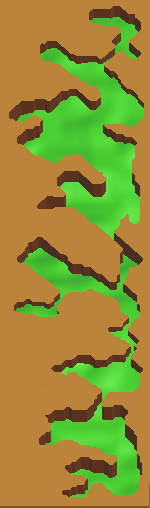
BORDERMAP:
Sets the thickness of the walls surrounding the map.


WIDTH AND HEIGHT:
Autodescriptive.


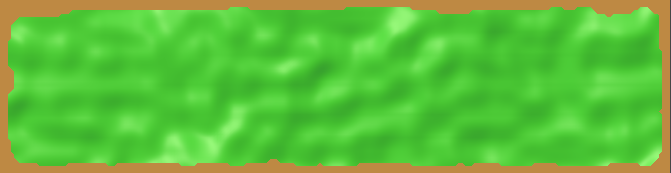
RANDOMFILLPERCENT:
This parameter sets the percentage of walls represented by 1 in the binary matrix created as a starting point with the previously defined width and height.


SQUARE SIZE:
Set the map scale
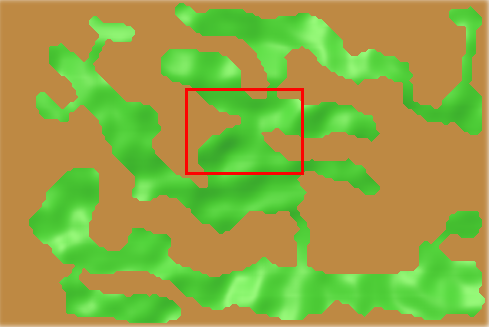

TUNNEL RADIO:
All open areas must be accessible, otherwise a tunnel is created to make the necessary connections. This parameter sets the width of the tunnels.

SEED:
Different seed, different map.


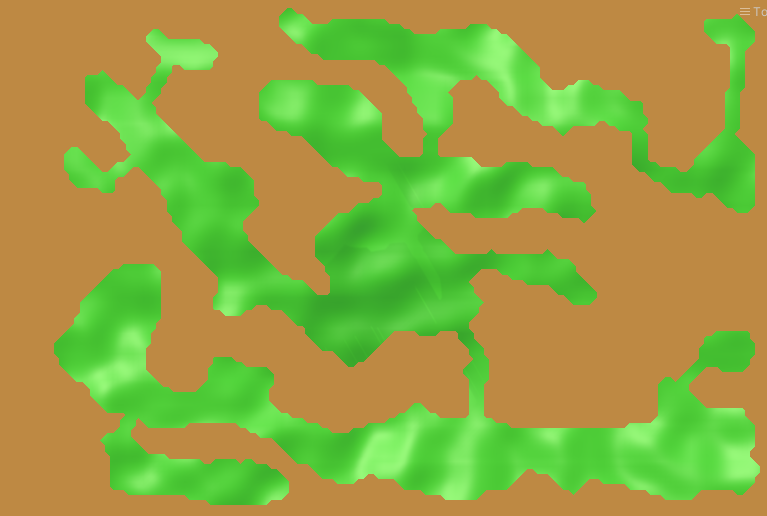
SMOOTH MAP ITERATIONS:
Low values generate more abrupt and angled shapes on the map surfaces and high values generate more rounded shapes.


LESS ORGANIC:
It gives a less organic appearance (with more straight parts) to the cavities that make up the map.


PHASE OF CREATION OF HEIGHT MAPS (GROUND LEVEL + MOUNTAIN LEVEL + SEA LEVEL)
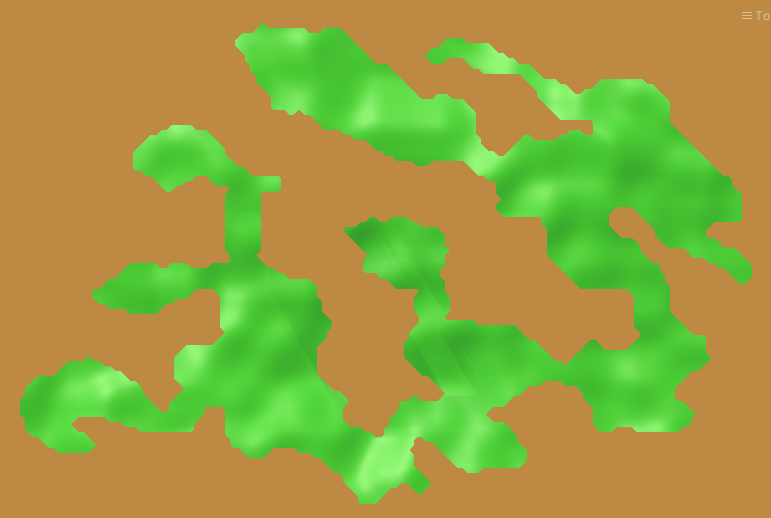
Using “Perlin Noise” to generate height maps and procedurally create terrain-like surfaces is a widely used technique in map generation. In MAP GENERATOR 3D the map that we have already generated at this point gives us endless possibilities to create almost any type of map but, at this point we can choose between:
1. Create a flat floor so the map is made up of two uniform lower and upper levels that can be accessed if the wall is very high by stairs or teleporters and if it is low enough, by jumping.
2. Create a height map with three layers that can represent almost any orography of the terrain that will appear on the map created in section 7.3 at the level that best adapts to the result desired by each designer. In this case the two clearly differentiated levels of the first option are blurred, opening the design possibilities to almost any result we could have imagined.


Within “MapPrefabCore” there are two child “Game Objects” on which the creation of the height maps depends:The first is “NoiseFloor&Water&MapLimits” and in relation to the creation of height maps the “user interface” is located in the “NoiseMapGenerator” component within “NoiseFloor&Water&MapLimits” and in the “WaterLevel” component within “WaterLevelFlat”. Next, we go on to detail the design parameters of each of the two components.
NOISEMAPGENERATOR
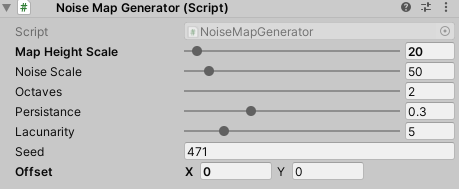
• The “MapHeightScale” parameter marks the difference in the vertical elevation of the generated surface. High values to create mountains and low to create surfaces with undulations with little vertical difference, value 0 to create a flat ground.
• The “Noise Scale” parameter softens the surface generated by increasing the value.
• The “Seed” parameter creates a new height map.
• The “Offset” parameter (Offset.x and Offset.y) is very useful to move the generated orography along the ground axes and position it where desired.
The rest of the parameters are conceptually more complex, so they are proposed as sliders with maximum and minimum values limited to those that make sense for the design process.For those users who want to delve deeper into these concepts, I attach a link with a good starting point:
WATERLEVEL

To configure the sea level we will modify the “WaterLevelHeight” parameter to the desired position. The “IsWater” parameter causes “props” to not be instantiated on the water surface by the “Free Cell Spawners”.
The empty “WaterLevelPrefab” section is for, if you choose to use a pretty water from a third pasty artist, we drag the artist's prefab as a child of “WaterLevelFlat” and drag it to this variable in the editor so that the water is not rendered original for preferring this prettier one.
The second is “NoiseFloorMountains” and represents the mountains on the map. It includes another component “NoiseMapGenerator” similar to the one previously described, but with parameter settings adapted to mountain simulation.

The relative position of the generated height maps, both of “NoiseFloor&Water&MapLimits” and “NoiseFloorMountains” with respect to the map generated in section “ 7.2. MAP CREATION PHASE”, is adjusted by the “transform.position.z” of each of the GameObjects.

Crea tu propia página web con Webador